As you probably know, Splunk provides realtime operational intelligence on machine data. It takes any unstructured data coming from various sources like websites, servers, networks, sensors and mobile devices. Splunk adds them all into searchable, intelligent indexes that enables to search, analyze, and visualize your data.
A common use case of using Splunk is to monitor all your devices to track down any issue or outage. Splunk will continuosly search log files from all your devices – servers, firewalls, applications, databases, routers, and load balancers etc. Then it gathers all relevant pieces of information into a central index that you can rapidly search to hunt down any issue.
Splunk has lots of other interesting use cases. The company is focusing on customer enablement by buidling special use cases adressing their customer’s demand. As per Splunk website, “more than 7,000 enterprises, universities, government agencies and service providers in more than 90 countries use Splunk Enterprise software”.
Recent announcement of Spunk’s strategic alliance with Tableau will help customers combine the power of Tableau’s structured data visualization with Spunk’s ability to unlock the unstructured data. This is a very important alliance in advanced BI and data visualization market.
Rather that reading further deep, I’ve decided to play around with Splunk’s powerful search capabilities.
You can download and install Splunk for free for personal or small-scale use. Just sign-up for a free Splunk account and pick the version appropriate for your operating system.
Here is the instruction to download and install Splunk. I’ve installed Splunk in my Mac (OS X version 10.9.1) using the DMG installer.
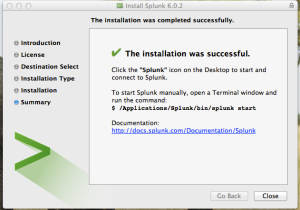
After the installation, you will get the message as shown in the right hand side. Follow the instruction in the screen to start Splunk.
Quick Note on OS X Installation: While installing Splunk in OS X, a helper application is loaded first that displays a dialog offering several choices on what you want to do after the install. Choose “Start and Show Splunk” option. You can run the helper application again to either show Splunk Web or stop Splunk.
The Splunk web interface is at http://your-host-name:8000.
 After the install, follow the link to open the browser window. For the first time, it will ask to log-in using username as admin and password as changeme that you will be prompted to change immediately.
After changing the password, the Splunk web browser will open up and you are ready to play.
So here you are! Splunk is now running in your computer to consume and unlock the power your data.
I plan to load some sample log files to explore the search capabilities in my coming posts.
- Splunk Installation Guide – http://docs.splunk.com/Documentation/Splunk/6.0.2/Installation/Chooseyourplatform
- Splunk References – http://www.splunk.com/resources
Tagged: analytics, big data, data visualization, machine data, Splunk, Tableau


[…] the previous post we have talked on Splunk – the powerful tool for searching and exploring the unstructured […]